How to Paint PERFECTLY Straight Lines On Textured Walls
Learn how to paint perfectly straight lines on textured walls with expert techniques, tools, and tips to achieve crisp, professional results.
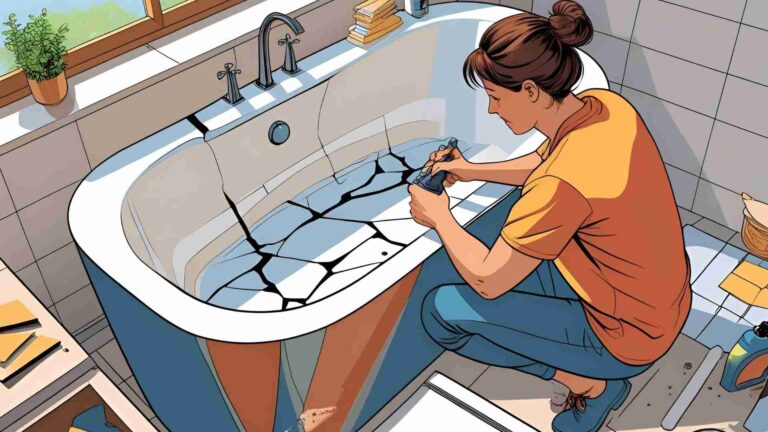
Painting textured walls to achieve crisp, straight lines is a challenge many DIY painters face. The uneven surface of textured walls—whether it’s orange peel, knockdown, or skip trowel—makes it difficult for painter’s tape to adhere perfectly, often resulting in paint bleeding under the tape and creating ragged edges. This comprehensive guide provides proven methods to fix existing uneven lines and prevent bleed-through in future projects, ensuring professional-quality results. Whether you’re painting stripes, accent walls, or crisp edges along ceilings or trim, these techniques will help you master the art of painting textured walls.
Understanding Textured Walls
Textured walls add depth and character to interiors but complicate painting projects. Common textures like orange peel or knockdown create small peaks and valleys that prevent painter’s tape from forming a perfect seal. Paint seeps into these gaps, leading to uneven lines. The key to success lies in sealing these gaps before applying the final color and using the right tools and techniques to touch up mistakes.
Why Textured Walls Are Tricky
- Uneven Surfaces: Textures create micro-gaps under tape, allowing paint to bleed.
- Tape Adhesion: Standard painter’s tape struggles to stick to textured surfaces.
- Color Contrast: Bleed-through is more noticeable when using contrasting colors, like light over dark.
This guide covers two primary methods to achieve crisp lines: the Seal-It Method (using base color paint to seal the tape) and the Caulk Method (using paintable caulk for a tighter seal). Additionally, we’ll discuss how to fix existing ragged edges and recommend tools and materials for optimal results.
Method 1: The Seal-It Method
The Seal-It Method is a widely recommended technique for painting straight lines on textured walls. It involves using the base color to seal the tape’s edge before applying the secondary color, ensuring any bleed-through matches the underlying surface.
Steps for the Seal-It Method
1. Paint the Base Color:
- Choose the lighter color as the base for better coverage (e.g., white for a white-and-gray scheme).
- Apply at least two coats of the base color to the entire wall and let it dry fully (24–48 hours).
2. Apply Painter’s Tape:
- Use a high-quality painter’s tape like FrogTape® Multi-Surface or 3M ScotchBlue Delicate Surfaces with EdgeLock.
- Press the tape firmly into the wall, focusing on the edge that will meet the secondary color. Use your finger to push the tape into the texture’s valleys.
3. Seal the Tape Edge:
- Paint a thin layer of the base color along the tape’s edge, overlapping slightly onto the tape. This seals any gaps with the base color, so any bleed-through blends seamlessly.
- Use a foam brush or a small artist’s brush for precision. Smooth out any lumps to avoid texture buildup.
- Allow this layer to dry completely (at least 4–6 hours).
4. Apply the Secondary Color:
- Paint the secondary color (e.g., gray for stripes) over the sealed tape edge and the designated area.
- Use a roller for large areas, leaving a small gap near the tape, and a brush for precise application along the edge.
5. Remove the Tape:
- Peel the tape off while the secondary color is still wet, pulling at a 45-degree angle in the direction of the tape. This minimizes paint pull-up and ensures a crisp edge.
- If any bleed-through occurs, touch it up with a small artist’s brush and the base color.
Why It Works
The Seal-It Method ensures that any paint seeping under the tape is the same color as the underlying surface, making bleed-through invisible. This method is ideal when you have access to both paint colors and are painting adjacent surfaces (e.g., walls and ceilings or two walls).
Pros and Cons of the Seal-It Method
| Aspect | Pros | Cons |
|---|---|---|
| Effectiveness | Highly effective for light to medium textures; produces crisp lines. | May require multiple drying periods, extending project time. |
| Ease of Use | Simple for beginners; no special tools needed beyond tape and brushes. | Requires careful application to avoid lumps in the sealing layer. |
| Cost | Low cost; only requires paint and tape. | May need extra paint for sealing, slightly increasing material use. |
Method 2: The Caulk Method
For heavily textured walls or when you lack the base color paint, the Caulk Method uses clear, paintable caulk to create a barrier that prevents bleed-through. This method is faster but requires careful application to avoid issues during tape removal.
Steps for the Caulk Method
- Paint the Base Color:
- Apply the base color (if painting the entire wall) and let it dry fully (24–48 hours).
- Apply Painter’s Tape:
- Use standard blue painter’s tape or FrogTape®. Press firmly to adhere to the texture.
- Apply Clear, Paintable Caulk:
- Choose a clear, paintable caulk labeled for “doors and windows” (e.g., DAP Alex Plus).
- Apply a thin bead of caulk along the tape’s edge using a squeeze tube for precision. Avoid caulking guns, as they dispense too much caulk.
- Smooth the caulk with your finger, pressing it into the texture’s gaps. Wipe away excess with a damp cloth or paper towel to prevent lumps.
- Ensure the caulk line is thin and smooth, as thick caulk can create visible ridges under paint.
- Paint the Secondary Color:
- Paint over the caulk and tape with the secondary color immediately, as the caulk should not dry fully.
- Use a brush for the edges and a roller for larger areas.
- Remove the Tape:
- Peel the tape off within 1–2 hours, before the caulk fully cures, to avoid sticking or pulling up paint. Pull at a 45-degree angle.
- If the caulk hardens, lightly score the tape edge with a utility knife before removal.
Why It Works
The caulk fills the gaps under the tape, creating a physical barrier that prevents paint from seeping through. Since the caulk is clear and paintable, it blends seamlessly with the final coat.
Pros and Cons of the Caulk Method
| Aspect | Pros | Cons |
|---|---|---|
| Effectiveness | Excellent for heavy textures; produces laser-straight lines. | Risk of caulk sticking if not removed promptly; requires precision. |
| Ease of Use | Faster than the Seal-It Method; no drying time for sealing layer. | Requires practice to apply thin, smooth caulk lines. |
| Cost | Slightly higher due to caulk cost (approx. $5–$10 per tube). | Caulk is reusable, but improper application can waste material. |
Caulk Specifications and Pricing
| Product | Description | Price (USD) | Where to Buy |
|---|---|---|---|
| DAP Alex Plus | Clear, paintable acrylic latex caulk, 10.1 oz tube | $5–$7 | Home Depot, Amazon |
| GE Paintable Silicone | Clear, paintable silicone caulk, 10 oz tube | $6–$8 | Lowe’s, Walmart |
| Loctite Polyseamseal | Clear, paintable caulk, 10 oz tube | $5–$6 | Ace Hardware, Amazon |
Fixing Ragged Edges on Already Painted Walls
If you’ve already painted and ended up with uneven lines due to bleed-through, don’t despair. Touching up ragged edges is possible with patience and the right tools.
Steps to Fix Ragged Edges
- Assess the Damage:
- Identify areas where the secondary color bled onto the base color. This is most noticeable with high-contrast colors (e.g., dark gray over white).
- Use an Artist’s Brush:
- Select a small, flat-edged artist’s brush (size 0 or 1) for precision.
- Dip the brush lightly in the base color and carefully paint over the bled areas. Work in small sections to maintain a steady hand.
- For intricate areas, use a steady hand or a straightedge (like a ruler) as a guide.
- Alternative: Scrape and Repaint:
- For stubborn bleed-through, use a new exacto knife to gently scrape off the excess paint.
- Repaint the area with the base color, feathering the edges to blend seamlessly.
- Re-tape for Larger Fixes:
- If the bleed-through is extensive, re-tape the area using the Seal-It or Caulk Method and repaint the secondary color.
Challenges and Tips
- Time-Intensive: Touching up with an artist’s brush can be tedious, especially for large walls or with a busy schedule (e.g., managing a 6-month-old, as one user noted).
- Color Matching: Ensure you have the exact base color. If unavailable, visit a paint store for a color match.
- Lighting: Work in good lighting to spot all bleed-through areas, as angled views may reveal imperfections.
Choosing the Right Tools and Materials
The quality of your tools significantly impacts the outcome. Here’s a breakdown of recommended products and their specifications.
Painter’s Tape
| Brand | Type | Width | Price (USD) | Features |
|---|---|---|---|---|
| FrogTape Multi-Surface | Delicate surface tape | 1 inch | $6–$8 (60 yd) | PaintBlock® Technology for reduced bleed |
| 3M ScotchBlue | Delicate Surfaces with EdgeLock | 1 inch | $5–$7 (60 yd) | Strong adhesion for textured surfaces |
| Blue Painter’s Tape | Standard blue tape | 1 inch | $3–$5 (60 yd) | Budget-friendly, works with Caulk Method |
Brushes and Rollers
- Foam Brush: Ideal for dabbing base color in the Seal-It Method. Cost: $1–$2.
- Artist’s Brush (Size 0 or 1): For touch-ups and precise edge work. Cost: $3–$5.
- 4-inch Mini Roller: For smooth application of secondary color. Cost: $4–$6.
Paint Types
- Latex/Acrylic Paint: Best for interior walls; dries quickly and is easy to clean. Cost: $15–$40 per gallon.
- Low-VOC or Zero-VOC Paint: Recommended for indoor use, especially with young children. Cost: $20–$50 per gallon.
Preventing Bleed-Through in Future Projects
To avoid ragged edges in future painting projects, follow these best practices:
- Choose the Right Tape:
- FrogTape® with PaintBlock® Technology is highly effective for textured walls due to its swelling edge that seals gaps.
- Test in a Small Area:
- Practice the Seal-It or Caulk Method in an inconspicuous spot to perfect your technique.
- Work in Good Lighting:
- Use bright, even lighting to ensure tape is applied correctly and to spot potential issues early.
- Remove Tape Promptly:
- Always remove tape while the paint or caulk is wet to prevent pulling up dried paint or sticking tape.
- Use Thin Layers:
- Apply paint and caulk in thin, even layers to avoid lumps that can ruin the line’s crispness.
Visualizing the Process with a Flowchart
To clarify the steps for both methods, here’s a flowchart illustrating the painting process for textured walls.

Troubleshooting Common Issues
| Issue | Cause | Solution |
|---|---|---|
| Paint Bleeds Under Tape | Gaps due to texture; poor tape adhesion | Use Seal-It or Caulk Method; press tape firmly into texture. |
| Tape Pulls Up Paint | Tape removed after paint dried | Remove tape while paint is wet; score with utility knife if caulk hardens. |
| Uneven Caulk Line | Too much caulk applied | Use a squeeze tube for precision; wipe excess with a damp cloth. |
| Visible Caulk After Painting | Non-paintable caulk used | Always use clear, paintable caulk (e.g., DAP Alex Plus). |
Tips from Experienced Painters
Drawing from community insights, here are additional tips to enhance your results:
- FrogTape Preference: Many painters swear by FrogTape for its PaintBlock® Technology, which activates with moisture to seal edges better than standard tape.
- Steady Hand for Touch-Ups: For minor bleed-through, a small artist’s brush and patience can produce near-perfect results, though it’s time-consuming.
- Avoid Overloading Paint: Apply thin coats to prevent buildup, which can create uneven lines or lumps.
- Practice Makes Perfect: Test techniques on a small wall section or a piece of textured drywall before tackling a large project.
Conclusion
Achieving perfectly straight lines on textured walls is entirely possible with the right techniques and tools. The Seal-It Method is ideal for projects where you have both paint colors and prefer a straightforward approach, while the Caulk Method excels for heavy textures or when the base color is unavailable. For existing ragged edges, careful touch-ups with an artist’s brush or re-taping with these methods can restore crisp lines. By using high-quality painter’s tape, clear paintable caulk, and precise application techniques, you can transform your textured walls into a showcase of professional-quality paintwork.
Whether you’re painting bold stripes, accent walls, or clean ceiling lines, these methods will save time and frustration while delivering stunning results. Experiment with these techniques, practice in small areas, and soon you’ll be painting like a pro, even on the most challenging textured surfaces.
Please share this How to Paint PERFECTLY Straight Lines On Textured Walls your friends and do a comment below about your feedback.
We will meet you on next article.
Until you can read, 9 Easy & Simple Ways to Stop Door Slamming Shut