How to Get Scratches Out of Wood Floors: 5 DIY Solutions
Learn how to remove scratches from wood floors with 5 effective DIY solutions. From walnuts to wood filler, restore your hardwood’s beauty easily.
Hardwood floors are a timeless addition to any home, offering elegance, durability, and value. However, scratches from kids, pets, or furniture can mar their beauty. Whether you’re dealing with superficial scuffs or deeper gouges, this comprehensive guide provides five practical DIY solutions to restore your wood floors. From natural remedies like walnuts to professional-grade products like wood fillers, we’ll cover everything you need to know to repair scratches effectively. Plus, we’ll include tips to prevent future damage and insights from real homeowners who’ve tackled similar issues.
Why Hardwood Floors Are Worth Protecting
Hardwood floors are a favorite among homeowners and designers for several reasons:
- Timeless Appeal: Hardwood never goes out of style, complementing both classic and modern interiors.
- Ease of Maintenance: Regular sweeping, dusting, or light mopping with a hardwood cleaner keeps them pristine.
- Durability: Properly maintained, hardwood floors can last over a century.
- Value Addition: They increase a home’s resale value, making them a smart investment.
- Technological Advances: Engineered wood and modern finishes enhance durability and moisture resistance.
However, scratches are inevitable, especially in high-traffic areas like kitchens or homes with kids and pets. The good news? Most scratches can be repaired with the right techniques and tools, saving you from costly replacements.
Understanding Scratch Types
Before diving into solutions, it’s crucial to identify the type of scratch on your wood floor, as this determines the repair method:
| Scratch Type | Description | Depth | Repair Approach |
|---|---|---|---|
| Superficial | Affects only the finish (polyurethane, wax, etc.) | Surface-level | Buffing, natural oils, or wax sticks |
| Minor | Penetrates the finish, lightly damages the wood | Shallow | Markers, stains, or light sanding |
| Deep | Gouges into the wood itself | Deep | Wood filler, stain, and polyurethane |
| Heavy Wear | Widespread scratches and gouges across the floor | Extensive | Full sanding and refinishing |
To assess the scratch, clean the area and inspect it under good lighting. If the scratch reveals bare wood or feels deep to the touch, it’s likely a deep gouge. Superficial scratches often appear as faint white or light marks on the finish.
Step-by-Step DIY Solutions for Scratch Removal
Here are five effective DIY methods to repair scratches on hardwood floors, tailored to different scratch severities. Each method includes step-by-step instructions, recommended products, and approximate costs.
1. Cleaning the Scratched Area
Why It Matters: Dirt and debris can make scratches appear worse and interfere with repairs. A clean surface ensures better adhesion for fillers or stains.
Steps:
- Vacuum or Sweep: Use a vacuum with a bare-floor setting or a microfiber dust mop to remove loose debris.
- Clean with a Hardwood Cleaner: Apply a hardwood-safe cleaner like Bona Hardwood Floor Cleaner ($8–$12 for 32 oz at Home Depot) or a DIY solution of 1:10 vinegar and water.
- Wipe Dry: Use a soft, lint-free cloth to dry the area thoroughly.
Tips:
- Avoid soaking the floor, as excess moisture can damage wood.
- Test any cleaner on a small, hidden area first to ensure it doesn’t strip the finish.
Cost: $0 (vinegar solution) to $12 (commercial cleaner).
2. Natural Remedies for Superficial Scratches
For scratches that only affect the finish, natural remedies can be surprisingly effective. These methods leverage oils to mask scratches and restore shine.
Method A: Walnut Rub
How It Works: The natural oils in walnuts penetrate superficial scratches, blending them with the surrounding finish. Social media users, like those on Reddit’s r/CleaningTips, praise this method for its simplicity and effectiveness across wood types, including oak and veneer.
Steps:
- Crack open a fresh walnut to expose the meat.
- Rub the walnut meat gently over the scratch, following the wood grain.
- Let the oil sit for 5–10 minutes.
- Buff with a soft cloth to blend and restore shine.
Tips:
- Use a fresh walnut for maximum oil content; stale walnuts may be less effective.
- This works best on light scratches and may require reapplication every few months.
Cost: $1–$2 for a bag of walnuts.
Method B: Olive Oil and Baking Soda Paste
How It Works: Olive oil moisturizes the wood, while baking soda provides gentle abrasion to smooth the scratch.
Steps:
- Mix 1 teaspoon of baking soda with a few drops of olive oil to form a paste.
- Apply the paste to the scratch with a soft cloth.
- Rub gently in the direction of the grain for 1–2 minutes.
- Wipe off excess with a clean cloth and buff to shine.
Cost: $0–$5 (common household items).
Method C: Coconut Oil
How It Works: Coconut oil penetrates scratches, hydrating the wood and reducing visibility. Designer Ashley Petrone recommends this for thirsty wood floors.
Steps:
- Apply a small amount of coconut oil to the scratch with a microfiber cloth.
- Rub gently to work the oil into the scratch.
- Wipe off excess and buff with a clean cloth.
- Repeat if necessary after 24 hours.
Cost: $5–$10 for a jar of coconut oil.
Note: Natural oils may not work on laminate floors, which lack the porous structure of real wood. For laminate, consider replacement planks or specialized pens (see below).
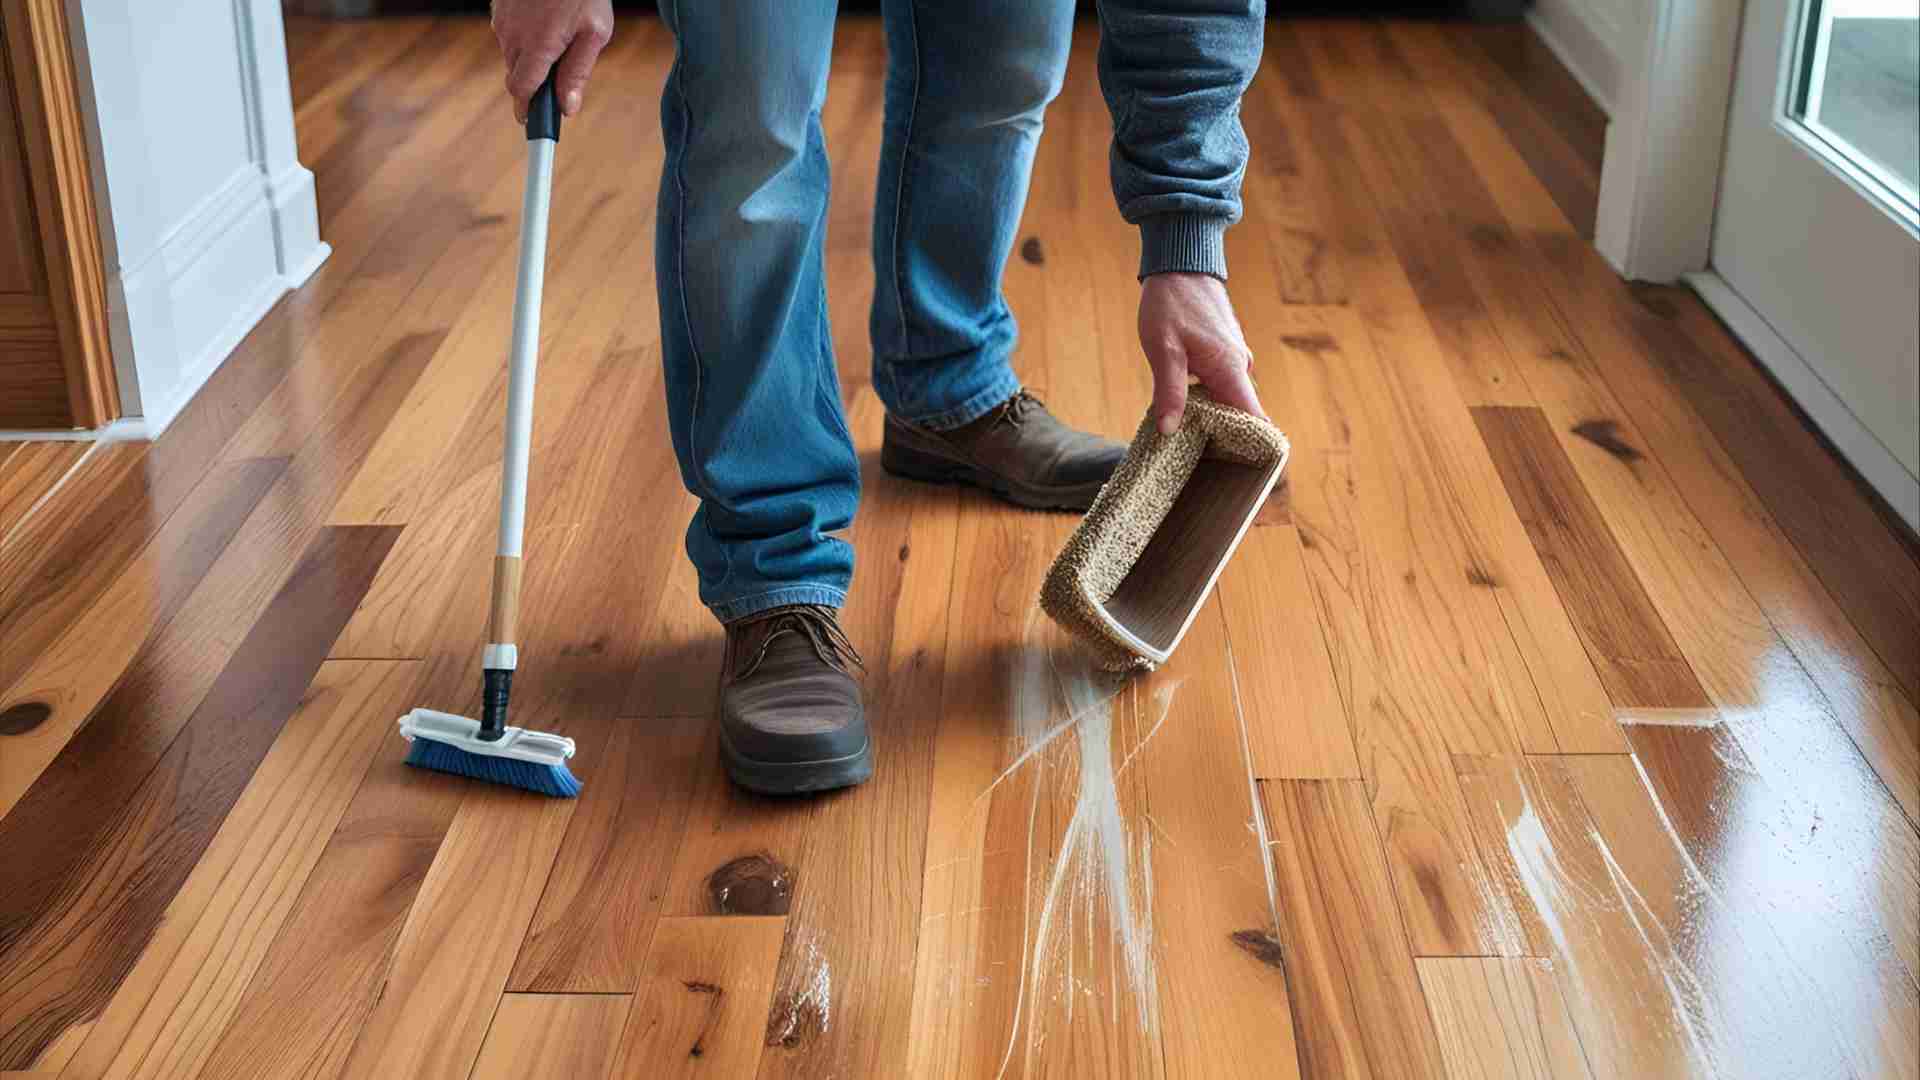
3. Buffing and Polishing for Minor Scratches
Minor scratches that penetrate the finish require gentle abrasion or polishing to restore the wood’s surface.
Method A: Fine-Grit Sandpaper
How It Works: Light sanding smooths the scratch and prepares the surface for a finish.
Steps:
- Use 220-grit sandpaper to gently sand the scratched area, following the wood grain.
- Clean away dust with a damp cloth.
- Apply a wood floor polish (e.g., Bona Floor Polish, $15–$20) or wax to restore shine.
- Buff with a soft cloth to blend.
Cost: $5 for sandpaper, $15–$20 for polish.
Method B: Magic Eraser (Engineered Wood)
How It Works: A melamine foam eraser (like Mr. Clean Magic Eraser, $3–$5 for a pack) gently removes scuffs on engineered wood.
Steps:
- Dampen the Magic Eraser slightly.
- Rub gently over the scratch, following the grain.
- Wipe the area with a clean, damp cloth and dry thoroughly.
Caution: Overuse can strip stain on hardwood, so test in an inconspicuous area first.
Cost: $3–$5.
4. Repairing Deeper Scratches with Fillers and Stains
Deep scratches require filling and coloring to match the surrounding wood.
Method A: Wood Filler
How It Works: Wood filler (e.g., DAP Plastic Wood, $7–$10 at Home Depot) fills gouges, creating a smooth surface for staining or sealing.
Steps:
- Choose a filler that matches your floor’s color (test on a hidden area).
- Apply filler with a plastic putty knife, pressing it into the scratch.
- Wipe off excess and let dry (per product instructions, usually 2–6 hours).
- Sand lightly with 220-grit sandpaper to level the surface.
- Apply a wood stain (e.g., Minwax Wood Finish, $8–$12) to match the floor’s color.
- Seal with a polyurethane finish (e.g., Minwax Polyurethane, $10–$15) using a small brush.
Cost: $25–$37 total.
Method B: Stain Pens or Touch-Up Markers
How It Works: Stain pens (e.g., Varathane Stain Marker, $6–$10) or touch-up markers (e.g., Rejuvenate Wood Furniture & Floor Repair Markers, $10–$15 on Amazon) color scratches to blend with the floor.
Steps:
- Select a pen color close to your floor’s shade.
- Apply the pen over the scratch, following the grain.
- Wipe off excess with a soft cloth immediately.
- Buff to blend and apply a clear polyurethane coat for protection.
Cost: $6–$15.
Tip: Reddit users suggest combining stain pens with wax fillers for better durability, as wax alone may wear off in high-traffic areas.
5. Refinishing for Heavy Wear and Tear
For floors with extensive scratches or gouges, refinishing the entire floor may be necessary.
Steps:
- Rent a Floor Sander: Available at Home Depot or Lowe’s for $40–$60/day.
- Sand the floor with progressively finer grits (60, 80, then 120-grit sandpaper).
- Vacuum thoroughly to remove dust.
- Apply a wood stain (if desired) to achieve your preferred color.
- Seal with a polyurethane finish (2–3 coats, drying 4–6 hours between coats).
- Buff lightly between coats for a smooth finish.
Cost: $100–$200 (rental, sandpaper, stain, and polyurethane).
Note: Refinishing is labor-intensive but cost-effective compared to professional services ($3–$7 per square foot). If the floor is engineered wood, check the veneer thickness, as it may only withstand one sanding.
Product Comparison Table
| Product | Use Case | Price | Where to Buy | Pros | Cons |
|---|---|---|---|---|---|
| Bona Hardwood Floor Cleaner | Cleaning | $8–$12 | Home Depot | Safe for all wood finishes | May not remove heavy dirt |
| Walnuts | Superficial scratches | $1–$2 | Grocery stores | Natural, affordable, easy to use | Temporary, may not work on deep scratches |
| Minwax Wood Finish Stain | Minor/Deep scratches | $8–$12 | Home Depot | Wide color range, durable | Requires careful color matching |
| DAP Plastic Wood Filler | Deep scratches | $7–$10 | Home Depot | Strong adhesion, sandable | Can crack if applied too thickly |
| Varathane Stain Marker | Minor/Deep scratches | $6–$10 | Home Depot | Precise application, easy to use | Limited color options |
| Minwax Polyurethane | Sealing | $10–$15 | Home Depot | Durable, glossy finish | Requires ventilation, drying time |
Preventing Future Scratches
Once repairs are complete, protect your floors with these strategies:
- Use Furniture Pads: Place felt pads ($5–$10 for a pack) under chair and table legs to prevent scratches.
- Trim Pet Nails: Regular trimming reduces pet-related scratches. For cats, provide scratching posts.
- Use Rugs and Runners: Place rugs in high-traffic areas like kitchens or hallways ($20–$100 depending on size).
- Avoid Abrasive Cleaners: Stick to hardwood-safe products to preserve the finish.
- Reapply Finish: Refresh polyurethane or wax every 3–5 years to maintain protection.
- Doormats: Place mats at entrances to trap dirt and grit.
Laminate vs. Hardwood: A Common Misstep
Some floors mistaken for hardwood are actually laminate, which affects repair options. Laminate floors have a printed wood-like surface and cannot absorb oils or stains like real wood. To identify your floor:
- Hardwood: Consistent grain and color; feels warm and slightly porous.
- Laminate: Varied plank shades, uniform patterns; feels smoother and cooler.
For laminate scratches, use replacement planks ($2–$5 per plank) or specialized pens like Varathane’s laminate repair pens ($6–$10). Avoid sanding laminate, as it can damage the surface.
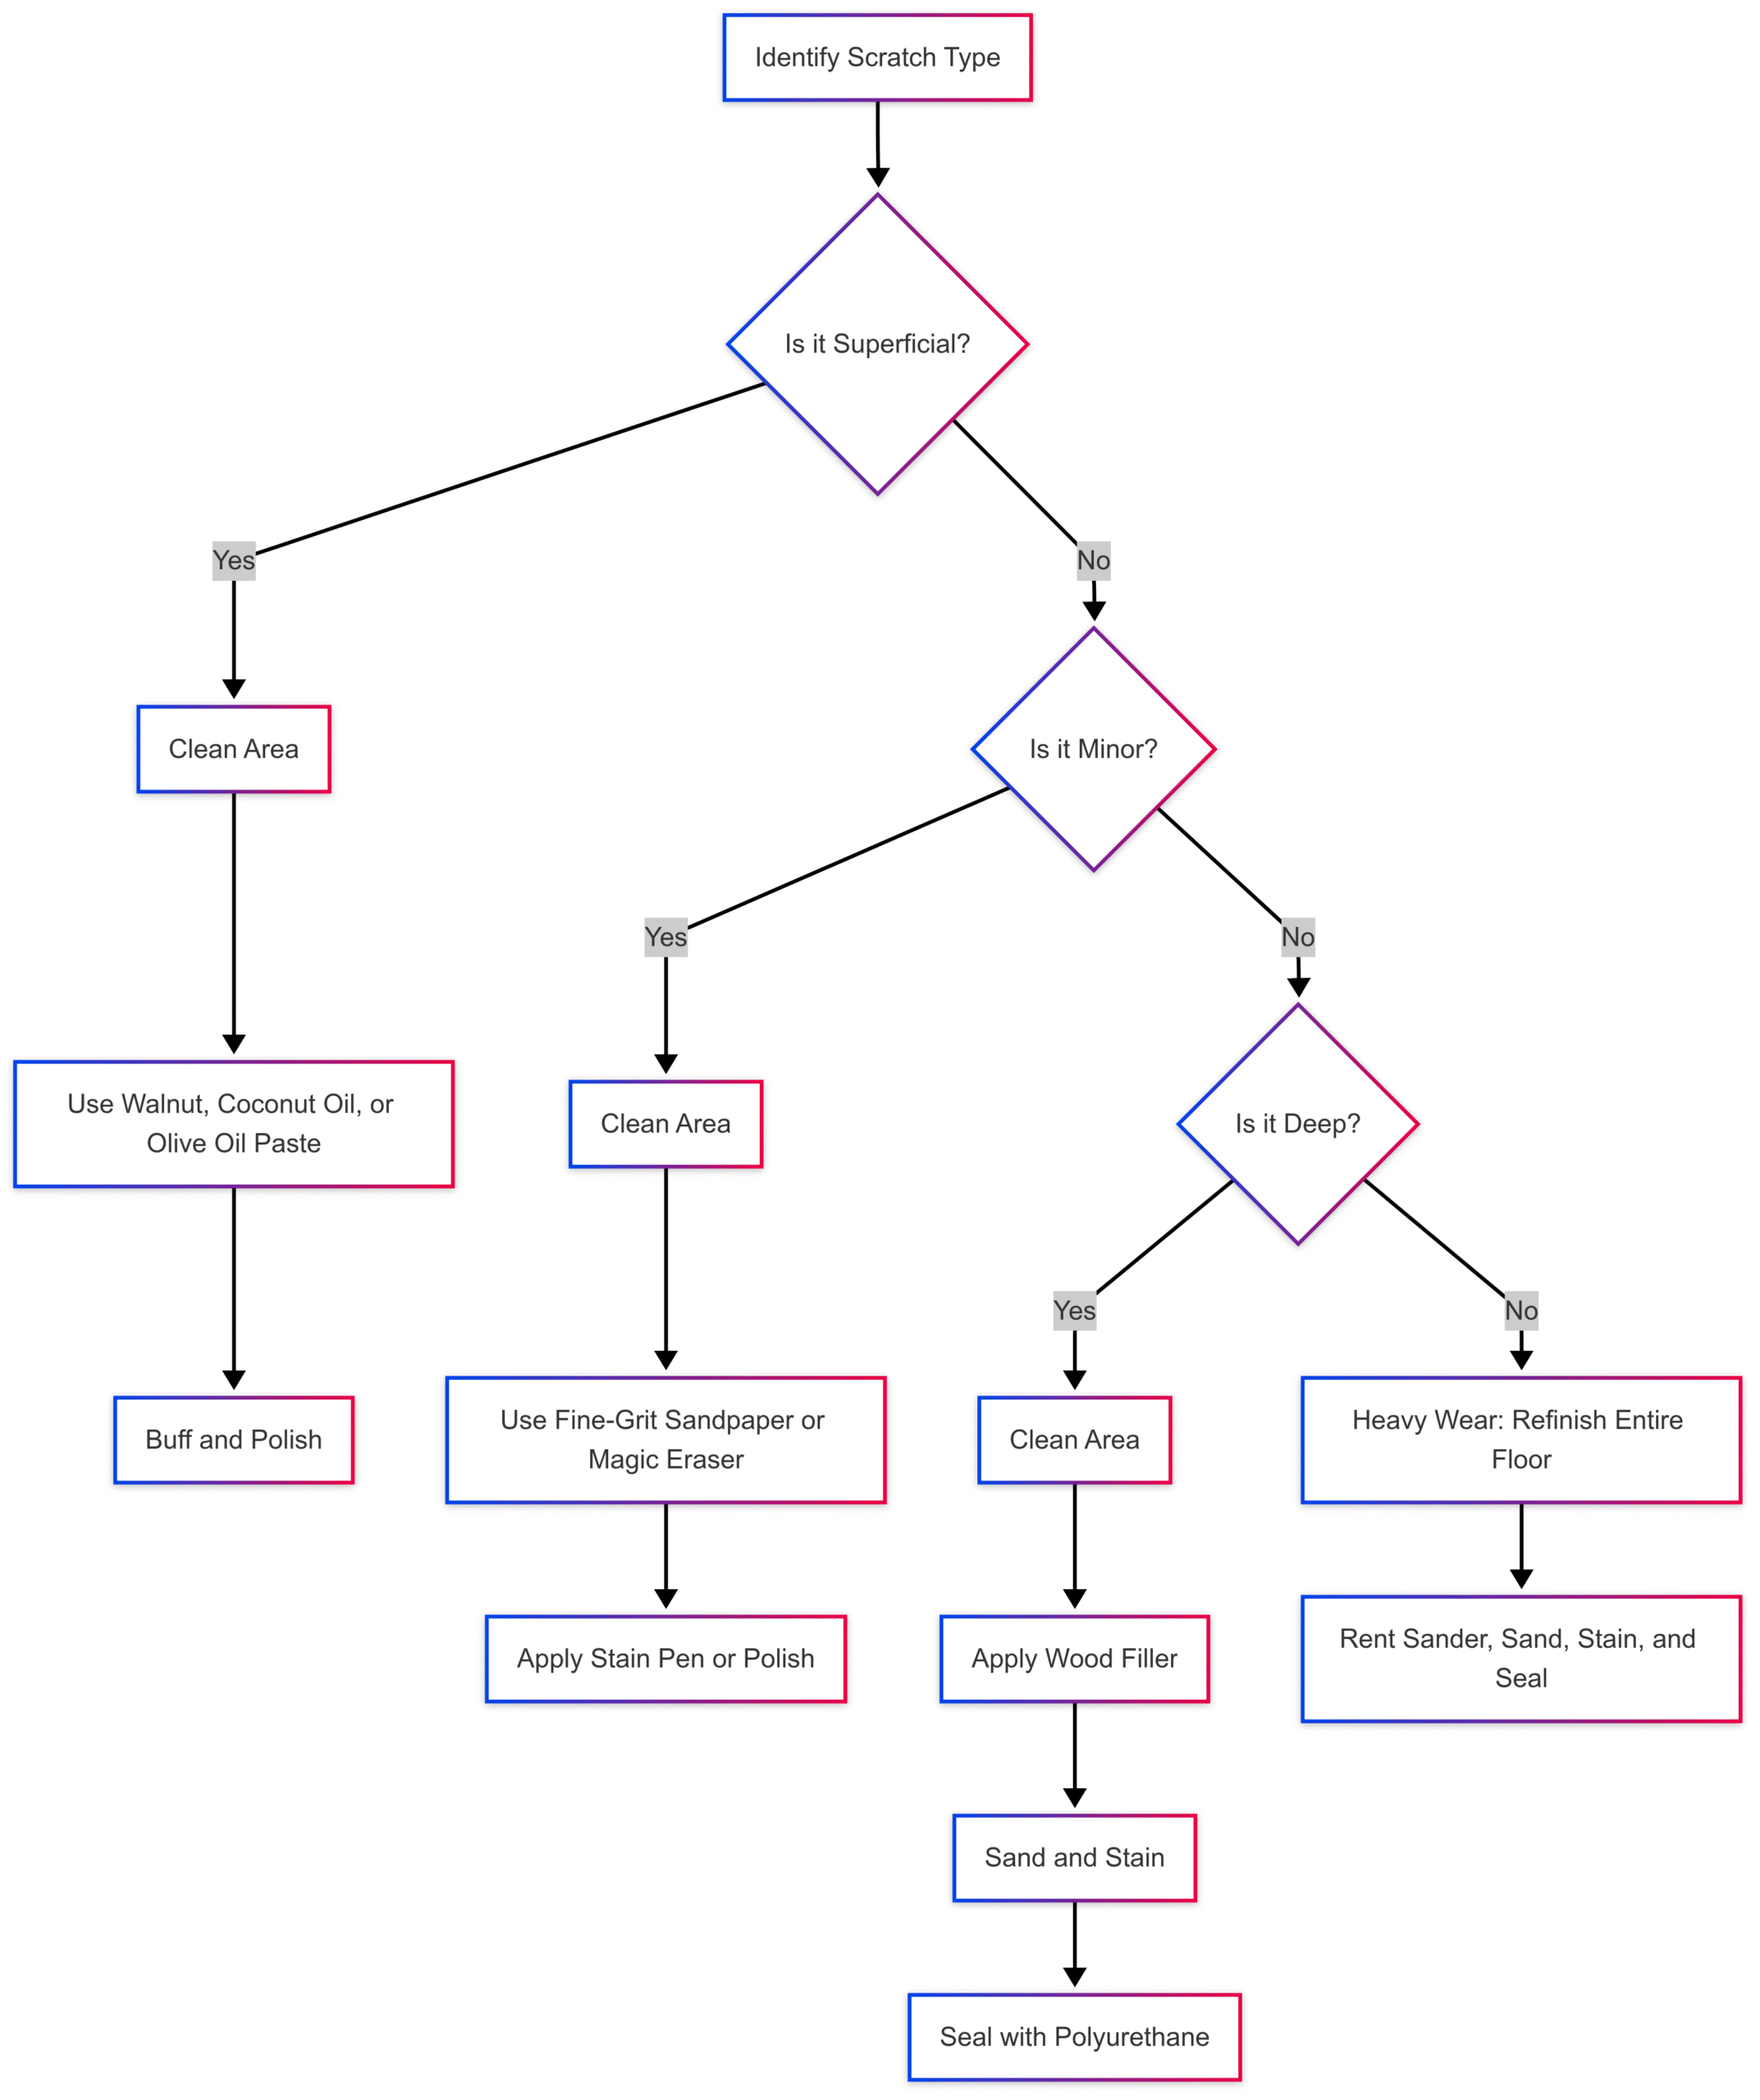
Chart: Repair Process Flow
Below is a flowchart to guide you through the scratch repair process:
When to Call a Professional
While DIY methods work for most scratches, consider professional help if:
- The scratch exposes bare wood for an extended period, risking moisture damage.
- Damage spans large areas or multiple planks.
- You’re unsure of the floor’s finish or wood type.
Professional services, like those from SVB Wood Floors in Kansas City, offer expertise in repairs, refinishing, and plank replacement. Costs range from $3–$7 per square foot, but professionals ensure seamless results, especially for engineered wood or custom finishes.
Real-World Insights from Homeowners
Reddit’s r/CleaningTips community offers valuable perspectives:
- Walnut Success: Users like Pipofamom and Andaandbanda confirm walnuts work on various wood types, though some, like Uncle_Larry, found it ineffective, possibly due to walnut freshness.
- Stain Pens vs. Crayons: LaylaDoo and others prefer stain pens over wax crayons for durability, especially in high-traffic areas.
- Laminate Challenges: Users like pothosbabebelikov note that laminate floors require different approaches, such as replacement planks or specialized pens.
These insights highlight the importance of testing methods and matching products to your floor’s material and color.
Conclusion
Repairing scratches on wood floors doesn’t have to be daunting. By cleaning the area, assessing the scratch type, and applying one of these five DIY solutions—walnuts, olive oil paste, sanding, wood filler, or refinishing—you can restore your floor’s beauty. Always match colors carefully, work with the grain, and seal repairs with a protective finish. For extensive damage or uncertainty, consult a professional to ensure long-lasting results. With proper care and preventive measures, your hardwood floors can remain a stunning feature of your home for decades.
Please share this How to Get Scratches Out of Wood Floors: 5 DIY Solutions your friends and do a comment below about your feedback.
We will meet you on next article.
Until you can read, How do I get the yellow out of the soles of Jordans?